

How Many Roofing Nails in a Coil: Essential Guide for DIY Projects
Determining the number of roofing nails in a coil is vital for roofing projects. Generally, a coil holds around 120 to 300 nails.
Roofing tasks need proper planning. Knowing nail quantities helps in budgeting and preparation. Coils of nails are used with pneumatic nailers, making tasks faster and easier. The number of nails in a coil varies based on manufacturer and nail size.
Understanding this helps avoid delays and ensures smooth progress. This blog will guide you through the factors affecting nail counts in coils. It will also help you choose the right coil for your roofing needs. Let’s dive into the details, ensuring your next project is well-prepared and efficient.
Introduction To Roofing Nails
Understanding how many roofing nails are in a coil is essential for any roofing project. Typically, a coil contains about 120 to 300 nails, depending on the nail size and type. This knowledge helps in planning and ensures efficient roofing work.
### Introduction to Roofing Nails When tackling a roofing project, one of the essential components you’ll encounter is roofing nails. These small, yet mighty tools hold your shingles in place, ensuring your roof stands strong against the elements. Understanding the different types of roofing nails and their importance can make your DIY project smoother and more successful. ### Types of Roofing Nails Roofing nails come in various types, each suited for specific materials and conditions. – Galvanized Roofing Nails: These are coated with zinc to prevent rust and are ideal for asphalt shingles. They are durable and weather-resistant. – Stainless Steel Nails: Perfect for coastal areas where salt in the air can cause rapid corrosion. These nails offer superior rust resistance. – Aluminum Nails: Lightweight and resistant to corrosion, making them suitable for metal roofs. – Copper Nails: Often used in more specialized applications, such as slate roofing, because of their durability and aesthetic appeal. The type of nail you choose can significantly impact the longevity and effectiveness of your roofing project. Make sure to pick the right one for your specific roofing material. ### Importance in DIY Projects Using the correct roofing nails is crucial in any DIY roofing project. They not only hold your shingles in place but also ensure your roof can withstand harsh weather conditions. Imagine spending hours or even days installing a new roof, only to have the shingles come loose because the nails you used weren’t up to the task. I remember my first DIY roofing project where I opted for cheaper nails, thinking it wouldn’t make much difference. A few months later, a storm hit, and many shingles were torn off. Lesson learned: never skimp on the quality of your roofing nails. So, before you begin your next roofing adventure, ask yourself: Are you using the right nails for the job? Investing in quality nails will save you time, money, and a lot of headaches in the long run.Coil Roofing Nails
Coil roofing nails are essential for any roofing project. They come in coils, making them easy to use with a roofing nailer. This helps speed up the roofing process. But how many roofing nails are in a coil? It depends on the type and size of the nails. Understanding coil roofing nails can make your project smoother and more efficient.
What Are Coil Nails?
Coil nails are nails connected by wires in a coil shape. They fit into a coil nailer, which is a power tool used for roofing and other projects. Coil nails are made of various materials such as stainless steel, galvanized steel, and aluminum. Their design helps roofers work faster without having to reload nails often.
Advantages Of Using Coil Nails
Coil nails save time. Roofers don’t need to reload nails frequently. This makes the process faster. Coil nails also offer better holding power. Their design allows for deeper penetration into the roofing material. This ensures a secure hold. They are versatile and can be used for different types of roofing materials. They are also cost-effective. Using coil nails reduces material waste and labor costs.
Estimating Nail Quantities
Estimating nail quantities for roofing projects is essential. Knowing the exact number helps in planning and budgeting. This guide provides insights into factors affecting nail counts and standard coil nail counts. Let’s dive in.
Factors Affecting Nail Count
Several factors impact the number of nails in a coil. Coil size varies, affecting the count. Larger coils hold more nails. Smaller coils have fewer nails.
Nail length also matters. Longer nails take up more space. Shorter nails fit more in a coil.
The type of material influences the count too. Thicker nails reduce the number in a coil. Thinner nails increase the count.
Standard Coil Nail Counts
Standard coil nail counts are usually consistent. Most coils hold between 120 to 300 nails. The exact number depends on the factors mentioned.
For roofing nails, common counts are 120, 150, 200, and 300 nails per coil. It’s crucial to check the packaging for precise counts.
Understanding these counts helps in accurate estimation. It ensures you have enough nails for your roofing project.
Choosing The Right Nails
Choosing the right nails for your roofing project is crucial. The nails you select will affect the durability and performance of your roof. This section will guide you through the best options for nail materials, lengths, and gauges.
Nail Material Options
Roofing nails come in various materials. Each material has its strengths and weaknesses. Common materials include steel, copper, and aluminum.
Steel nails are strong and durable. They are often coated to prevent rust. Copper nails are more expensive but resist corrosion better. Aluminum nails are lightweight and resist rust. Choose the material that fits your budget and climate needs.
Length And Gauge Considerations
Nail length and gauge are important. Length refers to how long the nail is. Gauge refers to the thickness. Longer nails provide better hold. However, they must not be too long to damage the roofing material.
Standard lengths for roofing nails are 1 to 2 inches. The gauge usually ranges from 10 to 12. Thicker nails (lower gauge) offer more strength. But they can be harder to drive in. Thinner nails (higher gauge) are easier to work with but may not hold as well.
Consider the type of roofing material you are using. Thicker materials may need longer and thicker nails. Thinner materials may need shorter and thinner nails. Always check the manufacturer’s recommendations.
Tools For Roofing Projects
When starting a roofing project, having the right tools can make the difference between a smooth process and a frustrating experience. Whether you’re a seasoned roofer or a weekend warrior, knowing which tools to use is crucial. Let’s delve into the essential tools you need for your roofing project.
Essential Roofing Tools
Your toolkit for a roofing project should include some basic items. A hammer is indispensable for driving in nails manually. A good utility knife is also essential for cutting roofing materials like shingles and underlayment. Don’t forget a tape measure to ensure precise measurements.
Safety gear is equally important. Always wear a helmet and safety glasses to protect yourself from falling debris. Non-slip boots are a must to keep you steady on steep pitches. A sturdy ladder will help you reach the roof safely.
Another essential tool is a chalk line. This helps you make straight lines on the roof, ensuring your shingles are aligned properly. A pry bar is useful for removing old shingles and nails. And of course, a caulking gun for sealing any gaps and preventing leaks.
Using A Nail Gun
If you want to save time, using a nail gun is the way to go. It speeds up the process significantly. You can drive nails quickly and accurately, reducing the time spent on each shingle. This is especially helpful if you have a large roof to cover.
Before you start, make sure you have the right nails. Roofing nails are typically 1 to 1.5 inches long. They come in coils, so you need to ensure your nail gun is compatible with the type of coils you have. Check the user manual for your nail gun to be sure.
Using a nail gun requires some practice. Hold the nail gun firmly and place it against the shingle where you want to nail. Press the trigger and the nail will be driven in instantly. Always keep a steady hand to avoid misfires.
Have you ever wondered how many nails are in a coil? It’s typically around 120 to 150 nails per coil. This can vary depending on the brand and type of nails. Knowing this helps you estimate how many coils you need for your project.
Remember, safety is paramount when using a nail gun. Always wear safety glasses and gloves. Follow the manufacturer’s instructions carefully. This ensures not only your safety but also the longevity of your tool.
What tools do you find indispensable for your roofing projects? Share your thoughts in the comments below!

Credit: www.homedepot.com
Installation Tips
Installing roofing nails properly ensures a strong and durable roof. Here are some essential installation tips to help you get started.
Preparing Your Workspace
Start by clearing debris from your workspace. A clean area prevents accidents and ensures smooth installation. Gather all necessary tools beforehand. This includes your roofing nails, hammer or nail gun, and safety equipment. Check the weather forecast. Avoid working in wet or windy conditions. These can make the job more difficult and dangerous.
Proper Nailing Techniques
Use the correct nail length. This ensures the nails penetrate the shingles and the roof deck. Position each nail properly. Place nails about an inch from the edge of the shingle. Avoid placing nails too close to the edge. This can cause shingles to crack. Drive nails straight into the shingles. Angled nails can cause leaks. Ensure nails are flush with the shingle surface. Protruding nails can damage the roof.
Follow the manufacturer’s guidelines for nail spacing. Consistent spacing ensures even and secure shingle placement. Practice these techniques to achieve a professional finish. Proper nailing extends the life of your roof and prevents future issues.
Safety Precautions
Installing or repairing a roof requires precision and care, and a significant part of this process involves handling roofing nails. Safety precautions are crucial to prevent injuries and ensure a smooth workflow. Let’s dive into some important safety measures you should follow when working with roofing nails.
Protective Gear
Wearing the right protective gear is essential. Ensure you have gloves to protect your hands from sharp edges and unexpected nail punctures. Safety goggles are a must to shield your eyes from flying debris and nails, especially when using a nail gun.
Consider wearing a helmet to protect your head from falls or dropped tools. Non-slip shoes can prevent slips and falls, providing stability as you navigate the roof’s surface. Don’t forget to wear long sleeves and pants to protect your skin from scrapes and sun exposure.
Handling Nails Safely
Handling nails might seem straightforward, but there are precautions to follow. Always use a magnetic wristband or a nail pouch to keep nails within reach without having to bend or stretch awkwardly. This reduces the risk of dropping nails or losing balance.
When using a nail gun, make sure it’s in good working condition. Regularly check for jams and malfunctions. Keep your fingers and hands clear of the nail’s path, and never point the nail gun at anyone, including yourself.
Maintain a clean workspace. Loose nails can cause trips or get embedded in shoes, leading to injuries. Keep your work area free from clutter and dispose of bent or defective nails immediately.
By taking these safety precautions seriously, you can protect yourself from potential hazards and focus on getting the job done efficiently. Have you ever had a close call while working on a roof? Share your experiences and tips in the comments below!
Credit: www.homedepot.com
Troubleshooting Common Issues
Roofing nails play a crucial role in the stability of your roof. But things can go wrong while using them. Troubleshooting common issues ensures the job is done right. Let’s explore some common problems and how to solve them.
Dealing With Nail Jams
Nail jams can slow down your roofing work. First, stop using the tool. Check the nailer’s magazine for any bent nails. Remove the jammed nail carefully. Use pliers if needed. Inspect the nailer for any damage. Replace any worn parts. Regular maintenance can prevent frequent jams.
Fixing Misaligned Nails
Misaligned nails can affect roof stability. Check the nailer’s alignment settings. Ensure the nails are loaded correctly. Test the nailer on scrap material. Adjust the depth setting if needed. Misalignment often occurs due to user error. Take your time to ensure proper placement.

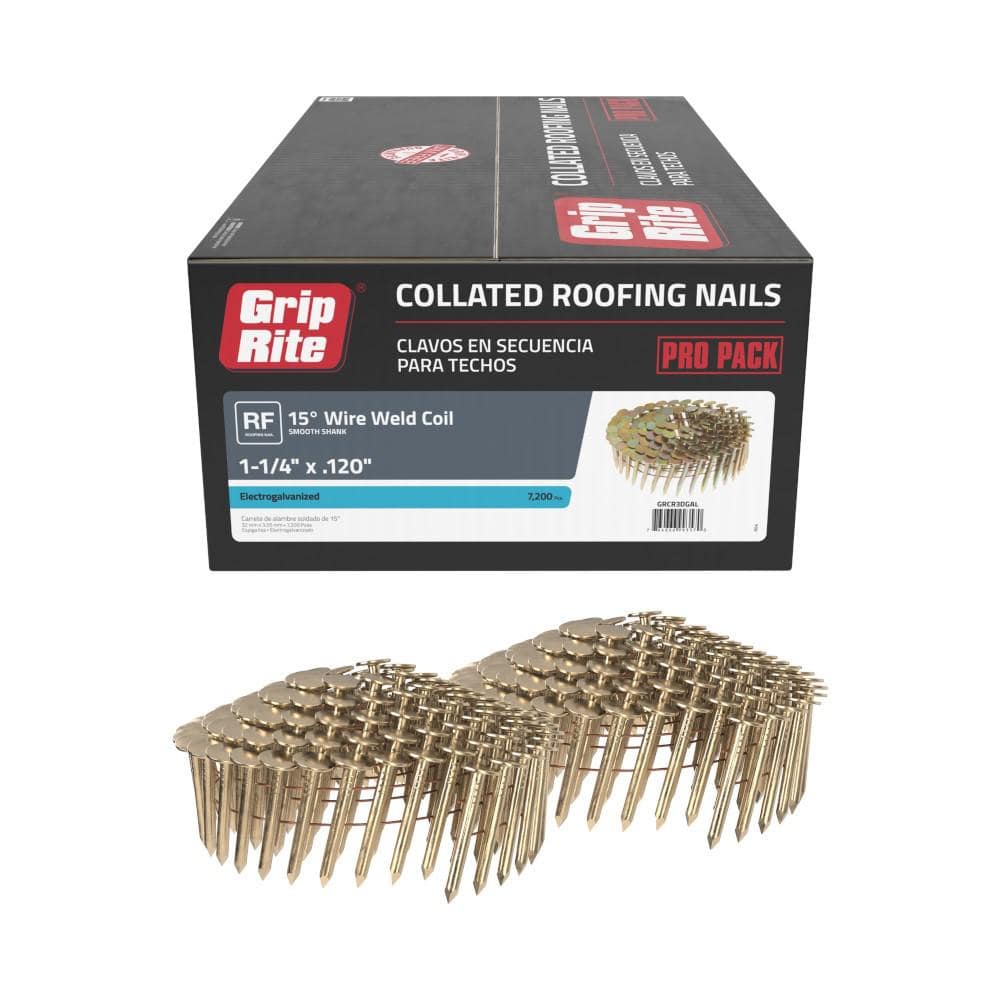
Credit: grip-rite.com
Frequently Asked Questions
How Many Nails Are In Each Coil Of Roofing Nails?
Each coil of roofing nails typically contains 120 nails. This quantity can vary based on manufacturer specifications.
How Many Coil Nails Per Square Of Shingles?
You need approximately 240-320 coil nails per square of shingles. This estimate covers standard installation requirements.
How Many Nails Does A Coil Nailer Hold?
A coil nailer typically holds between 200 to 300 nails. The exact number may vary by model and brand.
Do You Need 4 Or 6 Nails Per Shingle?
Use 4 nails per shingle in standard applications. Use 6 nails per shingle in high-wind areas for extra security.
Conclusion
Understanding the number of roofing nails in a coil is important. It helps you plan your roofing project better. Remember, different brands and sizes can vary. Always check the packaging for exact counts. This saves time and ensures you have enough nails.
Happy roofing!
{ “@context”: “https://schema.org”, “@type”: “FAQPage”, “mainEntity”: [ { “@type”: “Question”, “name”: “How many nails are in each coil of roofing nails?”, “acceptedAnswer”: { “@type”: “Answer”, “text”: “Each coil of roofing nails typically contains 120 nails. This quantity can vary based on manufacturer specifications.” } } , { “@type”: “Question”, “name”: “How many coil nails per square of shingles?”, “acceptedAnswer”: { “@type”: “Answer”, “text”: “You need approximately 240-320 coil nails per square of shingles. This estimate covers standard installation requirements.” } } , { “@type”: “Question”, “name”: “How many nails does a coil nailer hold?”, “acceptedAnswer”: { “@type”: “Answer”, “text”: “A coil nailer typically holds between 200 to 300 nails. The exact number may vary by model and brand.” } } , { “@type”: “Question”, “name”: “Do you need 4 or 6 nails per shingle?”, “acceptedAnswer”: { “@type”: “Answer”, “text”: “Use 4 nails per shingle in standard applications. Use 6 nails per shingle in high-wind areas for extra security.” } } ] }


